Declaratively add buttons to lightning flows, screens or communities
We created the Advanced Navigation button to fill a need in the user base. Salesforce is fantastic out of the box but there are limitations in particular with buttons. This managed package looks to meet some of those needs using clicks and not code.
The Advanced Navigation button, dubbed the “Magic button” by some, can be used for a variety of uses:
- Add bespoke navigation options in a flow. For example, replace the “Next” button with a “Save and View” button.
- Launch new record or edit page. For example, launch the create new account page with a specific record type.
- Auto launch a quick action. For example, automatically launch the new opportunity quick action when an account with the type “prospect” is created.
- Navigate to another page. For example, auto navigate to another record page when a certain status is reached.
Design
The Advanced Navigation button allows the user to change the appearance and text on the button.
“Button Style”
Preset styles shown below, an easy way to style up a simple button without any further work required. See documentation.
![]()
“Button Label”
Choose what text should appear in the button itself. Text choices on buttons have traditionally been limited in Salesforce, and this removes that limitation to an extent. You can choose to have “Save”, “Apply”, “Click this here”, “You are wonderful”, whatever text you deem suitable.
“Button CSS style”
Specify the style using CSS if using “text”. If text is not used i specifieds the style of the div containing the button. At present it is not yet possible to add styles directly to the button.
Utility Actions
“Auto Start without button press”
Exactly as the name states. It will auto-launch your chosen functionality, eg: flow or redirect without any user interaction. You can have this on a page where you want an action to kick off as soon as the page launches to streamline processes.
“Navigate to URL”
This nifty action will guide the user to the specified URL/page when they click on the button. Say you want the finish action to take them to a specific website or another record page, this is a really easy way to do it.
“Launch a quick action”
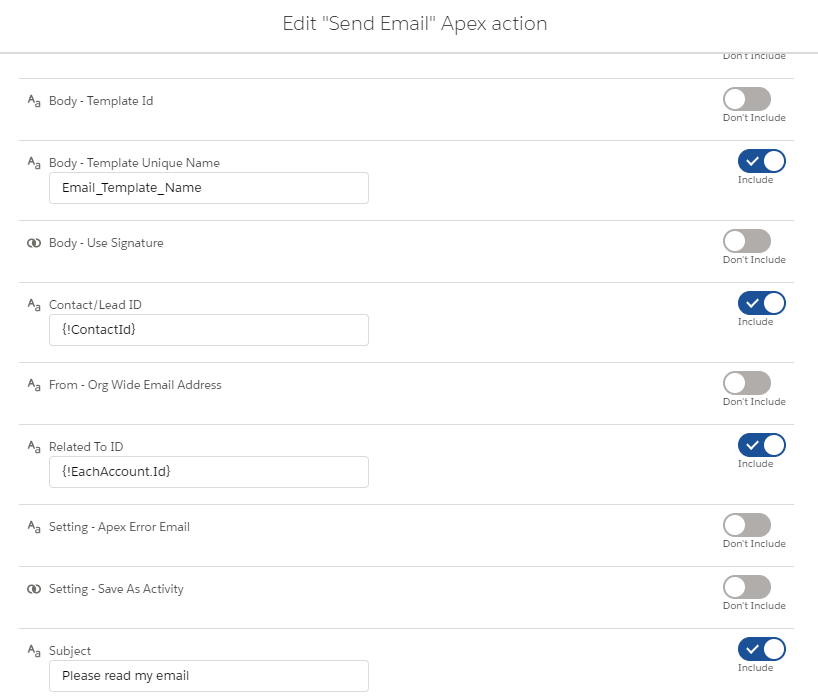
This is an extremely useful functionality where you can use the button to launch a quick action: For example: add a task on a new opportunity, or create an invoice on a won opportunity. The quick action does need to be on the page layout for this to work, and this needs to be populated with the API name of the quick action
“Flow action”
Expands your choices beyond the standard Flow buttons. You can turn them off and use the Navigation Button to set the flow action to either: next, back, pause, or finish. See docs.
“Output: Button Clicked?”
Use this to ascertain if a button is clicked in a flow. When the button is clicked it will set the variable here to true. This is useful if you have multiple buttons on the page to see which button was clicked on the flow screen.
“New Record:Object Name”
If you want to launch the create a record screen enter the object name here.
“New Record:Recordtype ID”
Only populate if you want to create a record. Enter the record ID to use. This alters picklist values and page layout choices.
“New Record:Predefined Variables”
You can prefill fields on the page. To do so add in the values in a JSON style format. Field:Value. “APiFieldName:Value,APiFieldName:Value”
For example, “FirstName:Ben” or “FirstName,Ben,LastName:Smith”
“Edit: Specific record Id to edit”
If you want to edit you can pass a specific record ID through to edit that record. For example a related record.
If blank it uses the recordId from the page it is on
“Edit:Do you want to edit a record?”
Mark as true if you want to launch the edit record page.